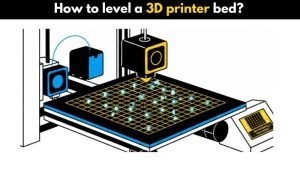
Getting the bed of your 3D printer level is a very important step that determines the strength and quality of your 3D prints. A level bed ensures the first layer sticks well to the build surface, setting a solid foundation for the rest of your print. This guide will help you with the whole process of leveling your 3D printer bed, covering both manual and automatic bed leveling.
To level your 3D printer bed, you’ll need to adjust the bed so it’s evenly parallel to the nozzle, ensuring good adhesion and print quality. You can do this manually using a piece of paper and heatbed knobs or by using an Automatic Bed Leveling (ABL) probe.
Problems caused by improper bed leveling
If your 3D printer’s bed is not level, you’ll face problems. The first layer won’t stick properly, which will lead to failed prints. It is not just about wasting filament, though that’s annoying.
Other problems caused by an unleveled bed include:
- Nozzle scraping the bed
- First layer squished too much or too little
- Gaps and weak spots in prints
- Warping and corner lifting
- Uneven walls and poor part strength
An improperly leveled bed can also damage your printer’s heatbed, build plate, or nozzle.
How to level the bed manually?
Manual bed leveling is all about using your hands to level your 3D printer’s bed. Unlike Automatic Bed Leveling (ABL), this method depends on your sharp eye and steady hands.
Before you start:
- Tighten the four bed knobs fully, then loosen each by the same amount so they’re equal.
- Make sure the bed springs have proper tension and are not too loose.
- Disable stepper motors if needed so you can freely move the nozzle.
Why you must preheat the printer before leveling
Heating causes thermal expansion. If you level the bed cold but print when it’s hot, the gap changes.
Always preheat to:
- Hotend: ~200°C
- Bed: 50–65°C
This gives you accurate leveling.
Manual bed leveling steps
Step 1: Gather tools
You’ll need a piece of paper or a feeler gauge.
Step 2: Preheat the printer
Preheat the nozzle and bed to normal printing temperature. This accounts for expansion during printing.
Step 3: Home the printer
Use Auto Home / Home XYZ on your printer.
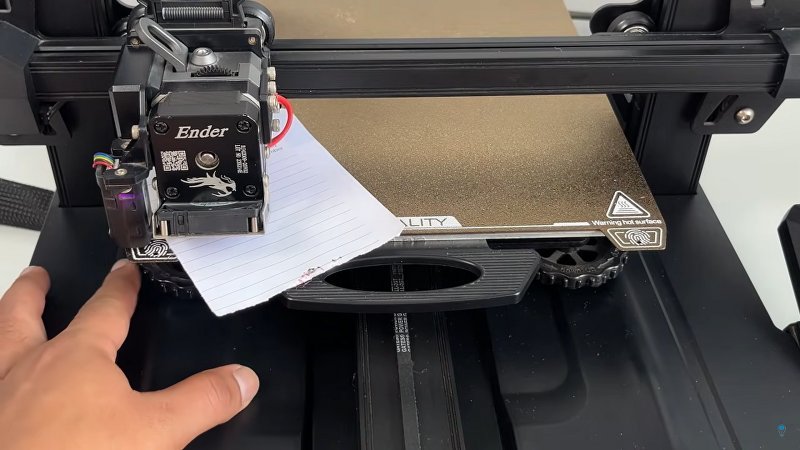
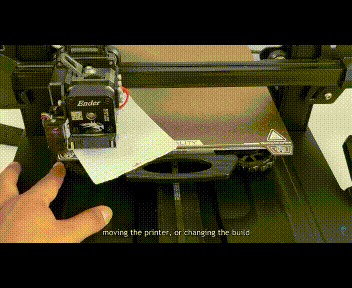
Move the nozzle to one corner of the bed and slide the paper between the nozzle and the bed.
Step 4: Adjust the bed knobs
Turn the heatbed knobs until the paper slides with light friction.
It should not move freely, and it should not get stuck.
Step 5: Check all corners + the center
After adjusting all four corners, move the nozzle to the center of the bed.
If the gap here is too big or too small, your bed might be warped.
Common fix:
- Add a glass sheet or PEI flex plate for better flatness
Step 6: Recheck everything again
Manual leveling usually takes 2–3 rounds to get perfect.
Step 7: Run a test print
Print a first-layer calibration pattern or a simple square.
Check whether:
- The filament is sticking well
- Lines are smooth and consistent
- No over-squishing or gaps appear
Step 8: Make final adjustments
If any area is off, slightly turn the bed knobs again until the first layer is even across the entire bed.
Automatic bed leveling (ABL)
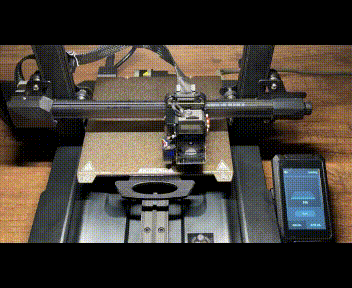
Automatic bed leveling uses a probe mounted beside your 3D printer’s nozzle to measure many points on the print bed. This measurement helps adjust for small height differences so the first layer sticks properly.
However, remember:
ABL does not replace manual leveling completely.
You still need the bed to be roughly level before running ABL.
How ABL works
- The probe measures the distance between itself and the bed
- The firmware creates a “mesh” showing high and low areas
- The printer compensates by moving the Z-axis during printing
ABL helps with:
- Beds that are slightly uneven
- Warped surfaces
- Faster and more reliable first layers
Z-Offset — The most important step after ABL
ABL measures the height of the bed, but it does not know where the nozzle tip actually is.
That’s why you must set Z-offset.
Z-offset controls the exact distance between the nozzle and the bed during the first layer.
How to set Z-offset
- Start a print.
- Watch the first layer.
- Adjust Z-offset from the printer screen:
- If the nozzle is too high → Decrease Z-offset
- If the nozzle is too close → Increase Z-offset
- Save the settings to EEPROM.
Good Z-offset = perfect first layer.
Without it, ABL will not work properly.
How to use auto bed leveling
Step 1: Start the ABL process
Use “Level Bed,” “Mesh Bed Leveling,” or your printer’s equivalent option.
Step 2: Let the probe measure the bed
Follow any on-screen instructions. The probe will move around and check several points.
Step 3: Adjust if your printer asks
Some printers show a mesh map and tell you if a corner is too low or high. Fix if needed.
Step 4: Set your Z-offset
This is crucial for first-layer success.
Step 5: Run a test print
Print a first-layer test and verify if:
- The lines are smooth
- No gaps
- No over-squishing
If needed, fine-tune the Z-offset again.
Final thoughts
Leveling your 3D printer bed is one of the most important skills in 3D printing. Whether you’re doing it manually or using automatic bed leveling, getting the first layer perfect ensures stronger prints, fewer failures, and a better overall printing experience.
Once your bed is level and your Z-offset is set correctly, your printer becomes far more reliable — and your prints will look significantly better.
FAQs
How do I manually level my 3D printer?
To manually level your 3D printer, first, turn off the printer then move the nozzle to each corner of the bed and use a piece of paper to gauge the distance between the nozzle and the bed. Adjust the bed knobs until the paper slides with little resistance. Repeat this process for all corners.
How do you straighten a 3D printer bed?
If the bed is warped, you may need to replace it or use a glass bed on top for a flat surface. Some people also use aluminum foil or tape under the bed to even out low spots.
How do you level my 3D printer bed in Ender 3?
In Ender 3, you can manually level the bed by adjusting the knobs under each corner of the bed. Use a piece of paper to measure the distance between the nozzle and the bed, aiming for slight resistance when sliding the paper.
How does 3D printer bed leveling work?
Bed leveling makes sure that the printing surface is parallel to the hot end, allowing for better adhesion and print quality. This can be done manually by adjusting knobs or automatically using probes like BL touch.
Does a 3D printer need to be perfectly level?
While it doesn’t have to be “perfectly” level, a well-leveled bed is important for good print quality and adhesion. Even small unevenness can lead to print failures.
Why can’t I level my 3D printer bed?
If you’re having trouble leveling, it could be due to a warped bed, worn-out springs, or mechanical issues with the printer. Check these things in your 3d printer and replace it if necessary.